


making your own adjustable ring base tutorial
Two weeks ago, Snowmaggedon hit. It looked like this at my house.
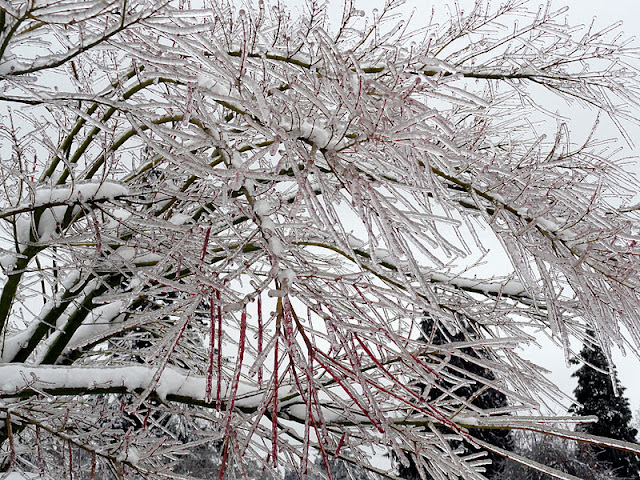
Thousands of people were without power, thankfully we had power, but we were without internet/cable/phone for several days.

Once the snow/ice started to melt, we finally braved the nearest town center and looked like this.
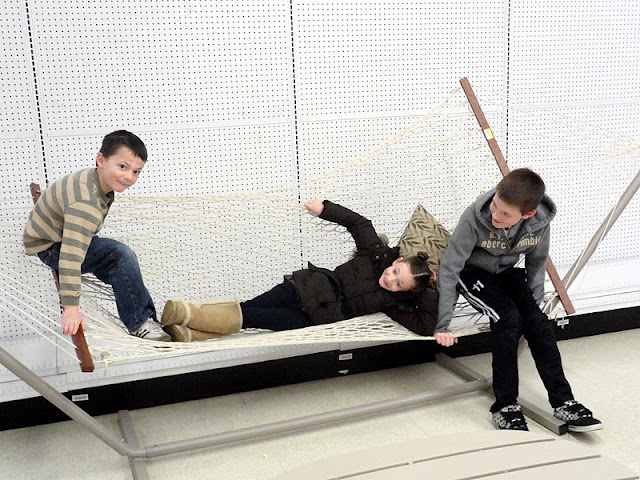
What can I say, we were totally feeling cabin fever.
I had been asked to lead a middle school girls youth group event that Sunday and while I thought I had a week to prepare and get supplies, it ended up snowing and leaving me housebound for the whole week.
Part of our event was going to include making felt flowers to put on rings like this one.

However, I ended up not being able to make it to the store to pick up ring bases, so I made (*) some of my own.


I settled on this 20 gauge steel wire that was $5.99 for 175 feet.

Before our internet went out, I stumbled upon this tutorial. However, by the time I needed the tutorial I couldn't access it so I was left trying to remember the steps. You can refer to this great tutorial here or follow along with me right here.

1. cut your wire about 8 inches long and start bending one end
2. continue to bend your wire making a tight spiral
3. once your spiral is finished, crimp the end
4. hold the spiral in place while you bend the wire around the back side of something round (I used a lipstick tube)
5. once your wire is all the way around, bend the wire back
6. wrap the wire back around your round something
7. pull your wire around and make the ring round shaping before you cut
8. cut the wire just slightly over where it meets the spiral
9. bend the end over your spiral and crimp into place making sure you don't have any sharp ends
10. enjoy!
*Guess who was better at making rings than I was?
Yep, my handy husband.

So he made a bunch for me
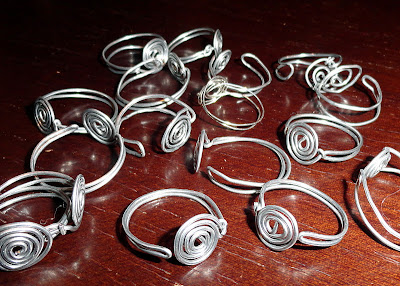
You could wear the ring the way that it is, or you can glue something on to the spiral like this felt rose.

Remember how my handy husband isn't just handy, he's also freakishly good at math?
Well, I had him do the math and find out how much each ring costs to make.
You need 8" of wire for each ring, and there is 175 feet of wire, so each ring ends up costing you about
(wait for it)
2 cents
Not too shabby!
Well, I had him do the math and find out how much each ring costs to make.
You need 8" of wire for each ring, and there is 175 feet of wire, so each ring ends up costing you about
(wait for it)
2 cents
Not too shabby!


22 comments
That's great! I never thought to make my own ring bases.
The pics of the iced over trees are beautiful. Everything here in Georgia is confused. The daffodils are blooming and the trees are starting to put out new leaves. I'm afraid they are going to be shocked soon...I hope not though!
There is an alternative to towel quilted going bedding which is newspaper bedding, darkish newspaper providing cover or create protects.
scrapbook album
Oh these rings are just beautyful! What a great idea. Just think of some wire that must be somewhere in our basement... have to try it out!
Those are absolutely AWESOME!!
Smart!! Love that your hubs was making them for you too! Too cute! TFS!
Xo
Heather
www.twindrgaonflydesigns.com
Very clever! Now I only need the patience to make these... :)
Visiting from: toddlindsey.com
love this! great idea, thanks. i do a lot of wire art but have not made a ring base like thais yet. i always get so excited when i learn something new!
Oooh, great tutorial! Thanks!
Great tutorial!! Thanks so much...I've been thinking about this lately and wondering how to do it! Now I know! Thanks again...pinning it for later!
This is awesome! I would love for you to share with Blog Stalking Thursday Link Party! http://thecraftyblogstalker.blogspot.com/2012/02/blog-stalking-thursday-26.html
they look great!thanks for sharing!
www.notimefortea.com
So you shared your 2 cents worth, lol. Looks really cute!
Necessity ( and Snowmageddon ) is really the mother of invention. I don't miss the snow ( or the power outages) but sometimes things force us to help our creativity along and this led to a genius idea!!
These are TERRIFIC! I love them and many thanks for sharing :)
I like your tutoriel Rachel
Flo
http://lartenciel.blogspot.com/
Felicidades, a mi me ha gustado mucho tu anillo....y el tutorial
Gracias por compartir/Congratulations to me I liked your ring .... and your tutorial
Thanks for sharing
What a clever tutorial! I think that I'll make a banch for me too!!!;o)
Love,Vailie!
super cool and cute idea. thanks for posting this and the original link :)
JoAnn
These are very cute! What a great idea!
However, PLEASE, please, please do not ever use galvanized steel to make jewelry. It contains zinc and can give off fumes that can make you very sick.
You can buy craft wire very inexpensively at any hobby store (Michaels, JoAnns, etc) so please use that instead.
Hi, just thought I'd let you know that the wire you are using can be harmful, and has been linked to cancer and other reproductive problems. I hope that you figured this out and did not use these, but, if not, you should not ever use it again. When I first started out making jewelry, I was about 12, and I found this at ACE and and bought it, but soon read the label more closely, and threw all I had got out. Read the label more closely next time please!
-Hay Hay
Thank you so much for sharing! This is a great party favor for the kids too! I am really enjoying your blog site! Thank you!
I have seen all of above pictures and read guidelines that how to make our own adjustable rings. Thanks for the useful information because I want to gift a handmade ring to my lovable partner.
create your own ring
Post a Comment