


My 12 year old daughter Isabella is probably by far, the craftiest person that I know.
This project is her own and I am happy to share it with you.
Who knows, this could become a regular segment here on Holy Craft!

I picked up a huge package of shrinky dink papers at a garage sale for $1.
When the kids were little we did shrinky dinks all the time.
Unfortunately, the last time we made shrinky dinks they all curled and were destined for the trash.
Which was a major bummer because of all of the hard work that the kids put into them.
We tried to figure out what the difference was and the only thing we could come up with is that we were now cooking the shrinky dinks in our gas oven, not our electric oven like we did at our old house.
I love our gas range, but the way gas works is that the oven heats up to the desired temperature and then turns off. Then when the oven starts to cool, the heat goes on again.
{please don't start a Wikipedia page with this description}
The temperature inside can spike and fluctuate which seemed to be causing a problem with cooking our shrinky dinks.
I tried to think of a solution and decided to attempt to use our embossing tool, which ended up working like a charm. So, if you have a gas oven and are having a hard time cooking your shrinky dinks
{first world crafting problems I know!}
you can get out your embosser and set to work.
That said, for this goldfish bowl project you will need:
a sharpie
an embossing tool {like this one}
ruler
spatula
scissors
hole punch
shrinky dink paper

Start by cutting out your goldfish bowl.
You will want to cut your paper twice as big as you want it to shrink to.

Measure the top of your bowl and find the middle.

Once you have found the middle, use a hole punch to punch a hole.
This will be where your necklace hangs through.

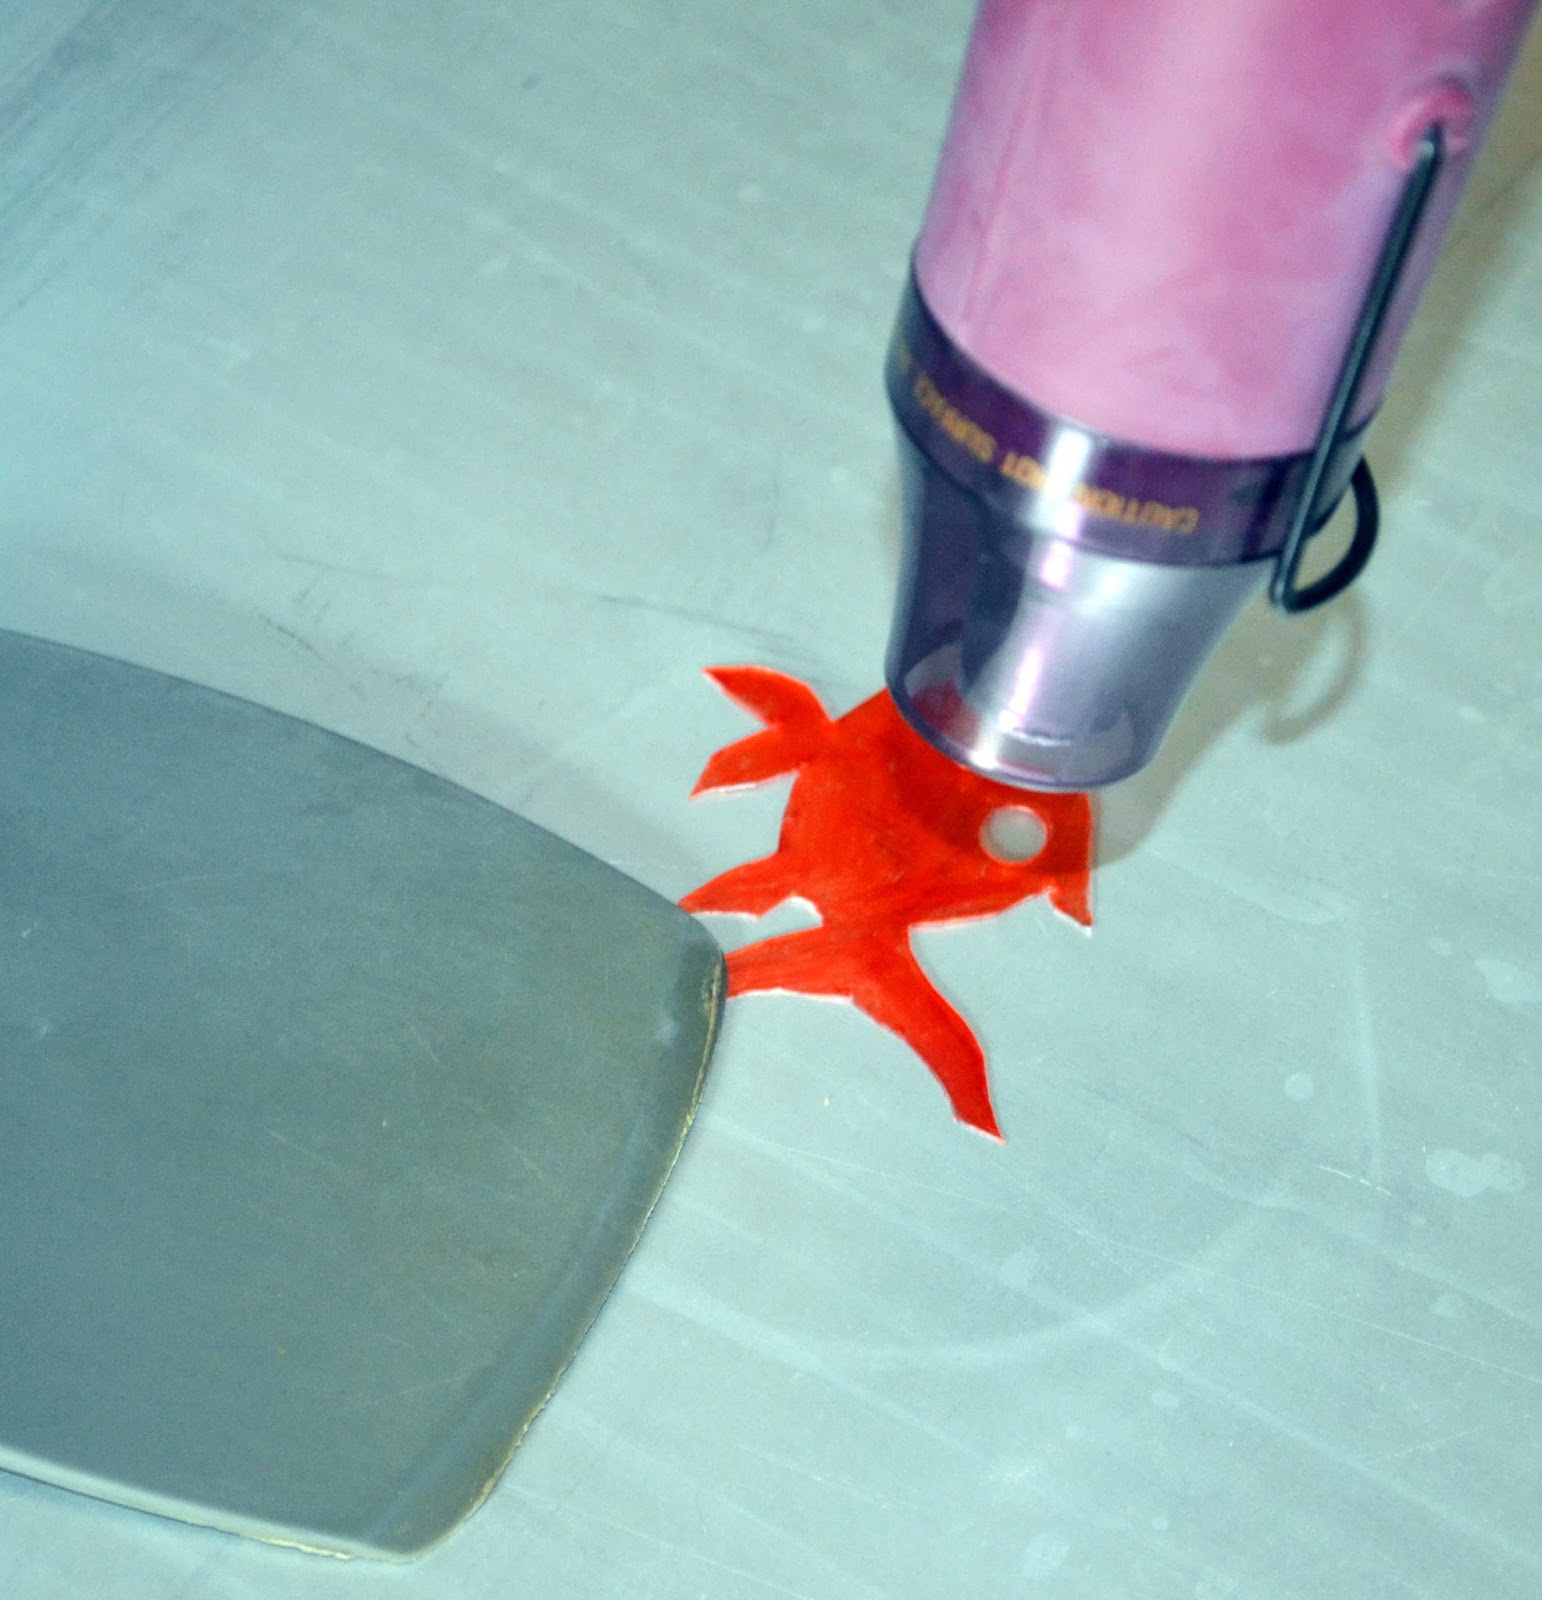
Using a spatula and your embossing tool, flatten your piece while you use your embosser.

The shrinky dinks will still curl, simply use your spatula to help mold your shrinky dink flat as you heat up your paper. Once your bowl has been shrunk and is flattened...

Cut out your goldfish.
Color your goldfish with your sharpie and put a hole punch in the top for the necklace and a smaller punch for the eye.

Using the same heat up and flatten method with your embosser and spatula, shrink your goldfish.
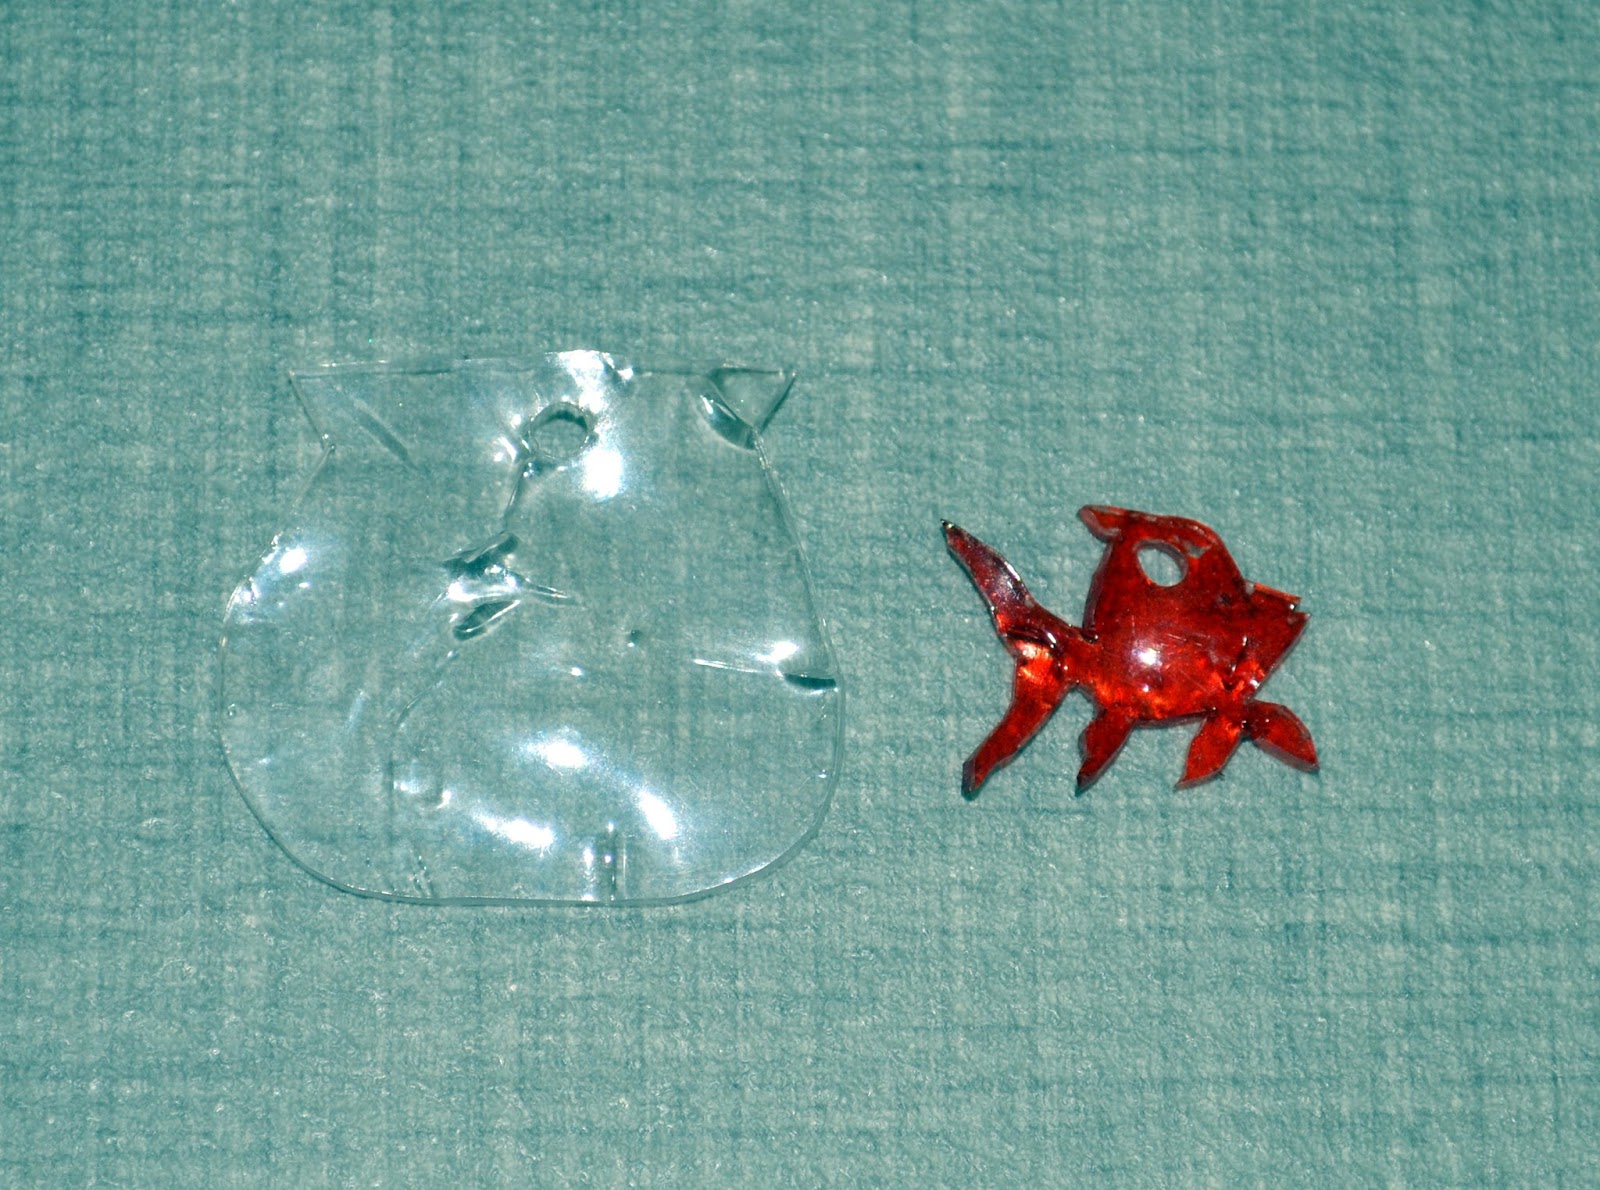
These are the two completed pieces.
To make your goldfish and bowl into a necklace, you will need chain, clasps and jump rings.
I attached one jump ring to the bowl and extended two more smaller jump rings from the bowl to the goldfish.
Secure your necklace and make it the desired length.

This is the finished goldfish bowl necklace.

Here are a few other pieces Isabella made with shrinky dinks.
From left to right: paper love note, goldfish necklace, anchor

chevron pieces
buttons


No comments
Post a Comment