


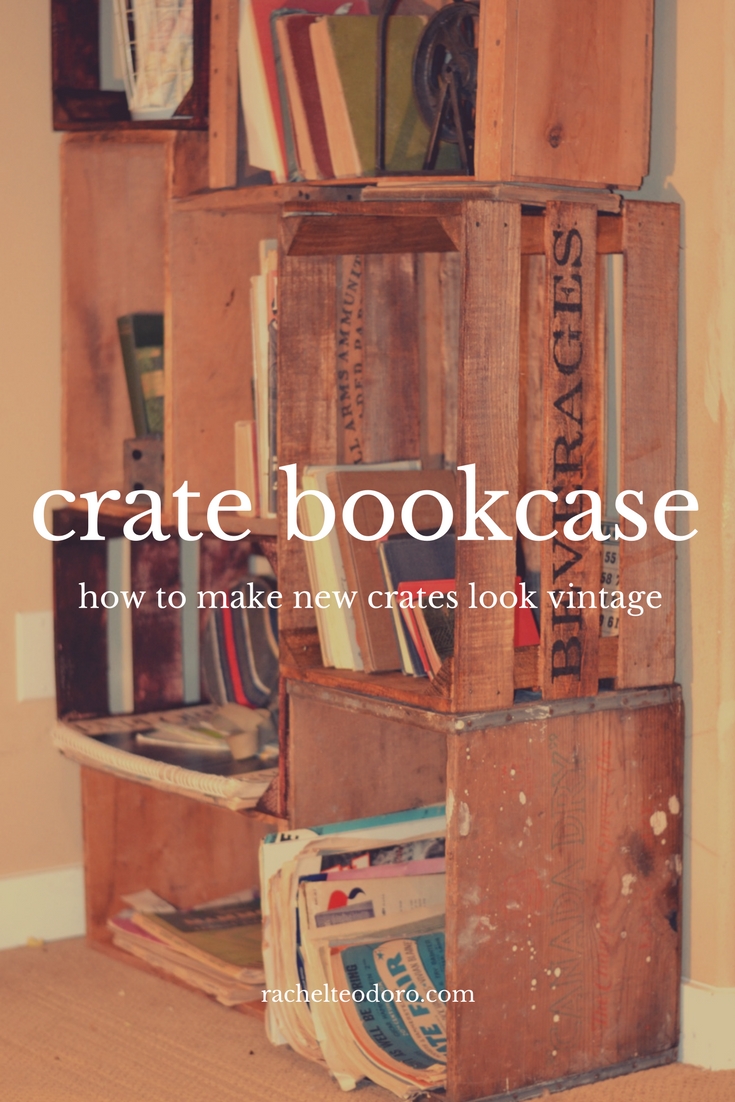
I don't know what it is, but I have a soft spot for old stuff. Rusty and worn with the edges peeling up, those are my favorite things. Sometimes though, in the hunt for old stuff, you don't always find what you are looking for. A collection can take years to build up and sometimes you just don't have the patience for it. For the past few years I haven't consciously been collecting vintage crates, it just sort of happened. But before I knew it, I had a half a dozen crates hanging out. I started to stack them and use them and sort of formed a mini bookshelf from crates. But there was something missing. It needed more crates. Just the other day, I was driving past a local food bank and I noticed a pile of crates in their free pile. These kinds of crates are flimsier than the solid vintage crates but I immediately thought of the stack of crates I had at home and knew that the thing that it was missing was more crates. I'm going to show you how I used those "new" crates and made them look vintage with a coat of stain and a stencil made from my Silhouette Cameo. You can't even tell the vintage ones from the new crates, which is my kind of knock off.

Don't forget to enter my blog anniversary giveaway! One winner could win an Expressions Vinyl Silhouette Cameo 3 bundle, a Silhouette Mint bundle, my two favorite appliances from HomeRight {a steamer and a paint sprayer} AND a $100 gift certificate to Dayspring. That's a prize pack that's valued at around $1500! Enter to win here.
I only recently started seeing these crates in the garbage, so either they have started becoming more popular or I just started noticing them. Either way, these crates were free! My guess is, you can find some in your area too. I think the have veggie shipments in them.


While I was waiting for the stain to dry, I designed a few sayings in my Silhouette software. I knew I wanted to use our last name {Teodoro} because I like handmade projects to have some meaning to me. I also made one that simply said beverages. The key to getting a good font for a vintage looking crate is to make sure your letters have some spacing between them. You can find the character spacing feature on the far left side in your Silhouette program when you are in the font menu.
I measured the length and height of the crate so I knew what size I wanted my letters. I cut longer than my mat, so I used my vinyl roll feeder. If you cut long vinyl, you NEED this. I didn't use it on the first cut and it ruined my vinyl because it slipped. After I put the vinyl on the roll, it cut perfectly. Once the vinyl was cut, I cut them into strips. Make sure you leave enough room on all sides since you will be stenciling them. I weeded the positive space since I wanted to be using the negative space on this project. See how you can see the blue paper behind in the top right image? Next, you want to use you transfer paper and weed the large blank space with the cut letters. This will become your stencil. Place your transfer paper and your stencil down to your crate and peel the vinyl off. This will leave you with your stencil.

I used a sponge brush to dab on black paint. It doesn't need to be perfect. Some bleeding makes it look more authentic I think. I peeled up my stencil before the paint had dried and then used a weeding tool to remove the small inside pieces, like that of the O or the R.
Then I blotted the paint with a paper towel and used sandpaper to give it a more distressed look.

I like using vinyl as a stencil because it's what I had on hand. I didn't even know Silhouette made stencil vinyl you can use just for this. I do like that I can use a roll and cut a piece of vinyl as long as I need, which is why I go back to using vinyl as a stencil time and time again.
After my crates were dry I took them up and arranged them together with my vintage crates. I think it's hard to tell which ones are the vintage crates, and which ones are the "new" veggie crates.

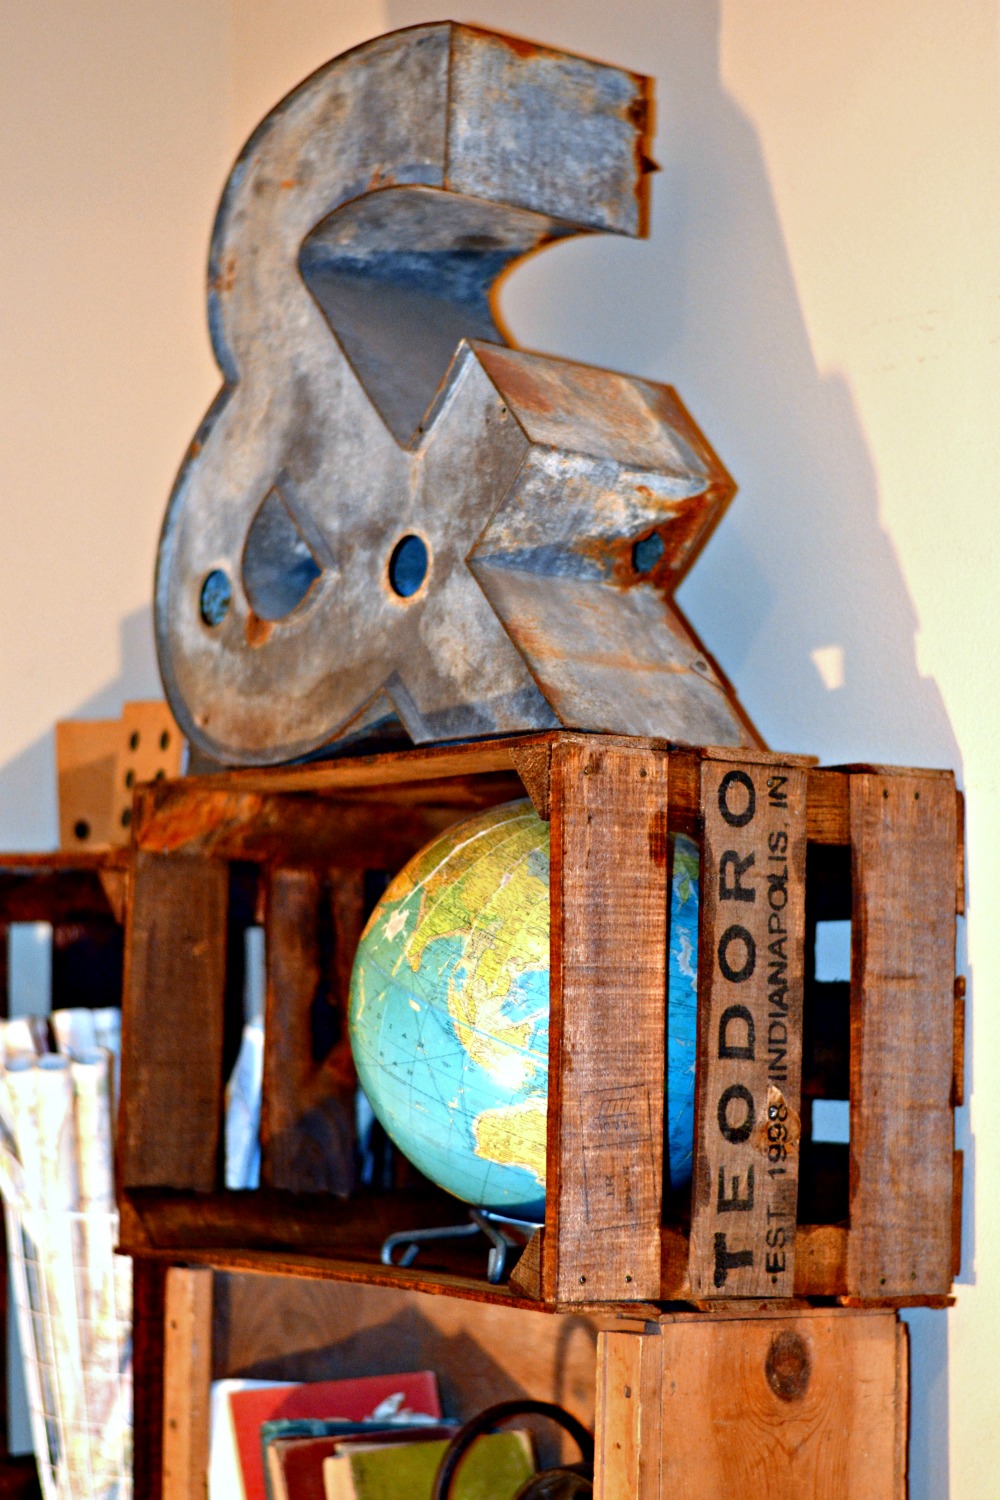
I paired all my rusty stuff and my old maps and books into my crate bookcase. I just love how it came out. If you have small children, you will want to make sure you have a more permanent securing process for your crates. You will also want to make sure it attaches to the wall. I don't have small kids, and this bookshelf is in a weird niche cut out area in our bonus room. I'm not worried about it falling. If I want to make it more permanent I will probably look into attaching the crates together down the line.


Check out all these other great New Years refresh projects made with the Silhouette. There are some talented bloggers giving you all kinds of inspiration.

Farmhouse Kitchen Canister DIY - Houseful of Handmade
DIY Bar Tray - Two Purple Couches
Rachel Teodoro - Making a New Crate Look Vintage + Using a Stencil Made from Vinyl
My Life from Home - Farmhouse Glass Kitchen Sign
Kock it off Kim - Pantry Refresh and Organization
Michelle James Designs - Cool Clock Update
Simply {Darr}ling - Upcycled Painted Globe: Adventure Awaits
Pocketful of Posies - DIY Dry Erase Calendar


7 comments
Wonderful idea and outcome!
Your crates look fantastic! You really can't tell the new ones from the vintage ones! Great project :)
I love the way these turned out. The vinyl is great for stencils and your crates are proof of that. They are so rustic and fun!
I love how these turned out! You really replicated the antique ones so well. Great job!
Love your style 😍
Rachel,
I love, love your crate bookshelf! What an awesome project! And your "new" crates look stunning! Pinning!
Greetings! Very helpful guidance on this post!
It is the little changes that make the biggest changes.
Thanks a lot for sharing!
Post a Comment