Tricia from
Leafy Treetop Spot hosted a lovely blog swap with me last week. In case you missed it, here is the tutorial that I posted on her blog.
Today I am going to share with you my tutorial on how to make wire wrapped rings using a vintage button.
Handmade Vintage Button Ring Tutorial


Here is what you need:
Measuring tape, wire cutters, a button with the shank on the back, 28 gauge wire, a deep well socket (I found mine in my hubby's tool box. I used 1/2 inch but I have little fingers! You can use an actual ring making tool if you have one, I don't, so I made do) and some needle nose pliers

Cut your wire to 36" long

Find the center point of your wire and do a cheesy grin (only kidding about the grin part!)

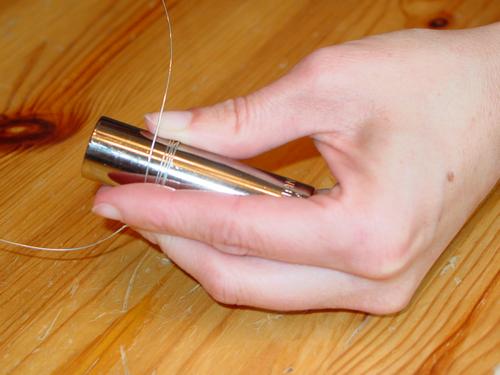
Starting with the center of the wire, place it on your socket and start wrapping around about 6 times.
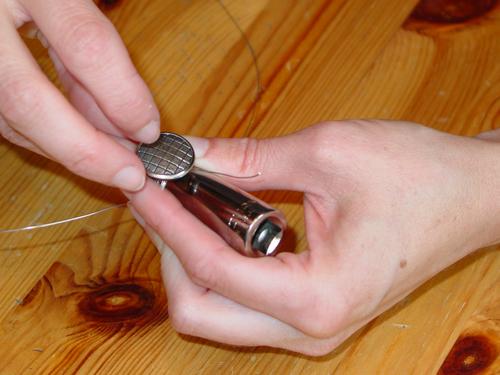
Cross your wires and thread each end through the button shank

Pull tightly so that it's close to the socket
Making a figure eight, thread the wire through again with both ends
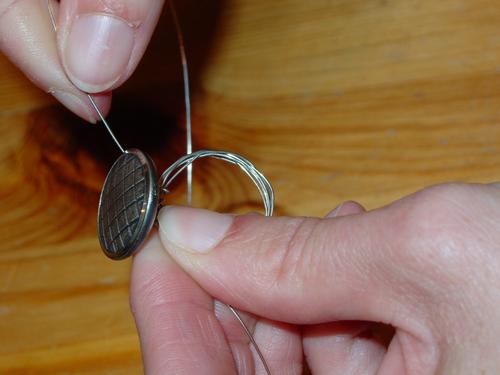
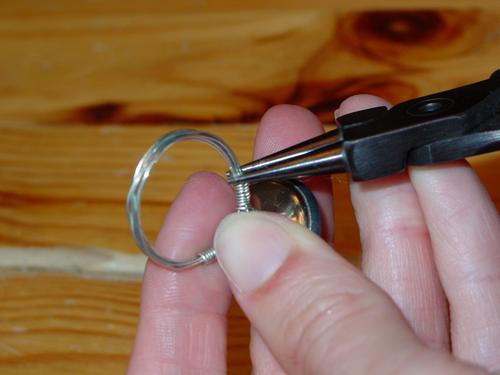
Equally wrap both ends around the shank covering it with wire to hold it in place. Working from the top of the shank to the bottom closest to the ring.

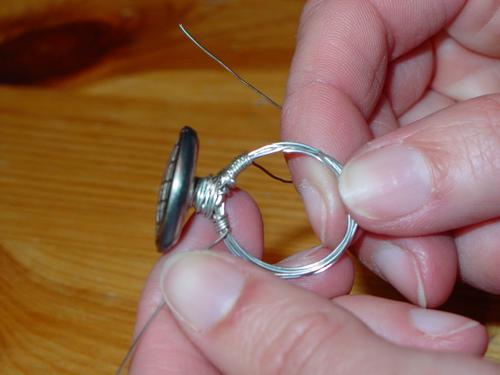
Start wrapping your wire around the ring on each side. I did about 15 wraps on each side. Make sure you pull tightly and that each wrap is next to the other with no gaps.
Once you have the desired amount of wraps, cut off the excess wire as close to the ring as possible. Using your needle nose pliers, squeeze down the end so you don't have any sharp ends left up.
That's it! Put it on and accessorize!

Pretty cool right? And all one of a kind.

You can wrap the whole ring or just a portion of it. Create it any way you like!


loading..


25 comments
I love, love, LOVE this! Such a cute idea, and I absolutely adore that turquoise one! I'm going to have to go through my stash of buttons that my grandmother gave me for some fun rings :]
These are beautiful!
Oh Rachel, what a beautiful idea!!!
Your blog is SO cute! I have recently started a Handmade Tuesdays which features a tutorial (let me know if you ever want to be featured) and then a linky at the bottom. I never knew it would be so hard to get it going but it's worth it :) But I would love for you to participate!
These are adorable! Great tutorial, thanks!
That is really, really cute! Lisa~
Wowza, these are VERY cool! Nice job!
Great Idea & very cool!
LOVE the rings!!! I'm your new follower:)
Adorable! Great job!
These are really pretty! I've seen them at craft fairs but I've never thought of making any myself! Thanks!
Oh they are fabulous! And you really made the process look so easy. Thanks!
I love these! I just saw some in a shop today (for way too much) and thought I would like to know how to make one. Thanks!
These are amazing! They are so pretty! Thanks for linking up with While He Was Napping! Hope to see you again next weekend!
Krista
I LOVE this idea! I just found some super cool buttons...I may have to try this :)
New follower! Come on over and visit me too! :)
http://christinasadventures2010.blogspot.com/
Great idea, thanks for sharing. I just love old buttons and make things out of them too.
This is marvelously clever! Gotta try it and soon!
So beautiful! I love the vintage buttons! Great idea.
I love it! I have a gazillion vintage buttons from my grandmother and couldn't think of what to do with them. Even the military buttons off of my grandfather's uniform!
Great idea!
Rachel, These are so unique. I love the vintage buttons. Great tutorial. I featured this today - stop by and grab a featured button if you like. Thanks so much for linking to The Sunday Showcase Party. I greatly appreciate it. Hope you have a wonderful week. ~ Stephanie Lynn
Love the little rings! I'm a follower now, and I know I'm going to enjoy the ride.
I have a fledgling blog at http;//wynd.me/witty, if anyone would be so kind as to check it out.
This is such a beautiful project and a great gift idea. Thanks for linking up to our party! Sorry I am a little behind.
I wanted to let you know that I am featuring this project on my craft blog Polly Want A Crafter during our DIY Gift Ideas week it will post 11/24 @ 5:30 pm. I hope you have a bunch of new visitors!
Casity
Wow. This is quite unique and interesting way to make a different style ring. I will definitely to make one.
vintage anniversary rings
I love this idea! Just saw some at a craft fair and thought, "I could make those!" So of course I googled it and found your blog. Thanks for the instructions!
I'll be back!
Stephanie
http://www.ledbytheshepherd.wordpress.com
Thank you for the tutorial. I just received some wonderful Czech glass buttons and I am eager to make them into rings but didn't know how. I will give this a try. Merry Christmas!
Post a Comment