How to make a standard shirt cuff link ready

How to Make a Standard Shirt Cuff Link Ready


My oldest son is kind of a fan of dressing up. He is a member of his High School FBLA team and recently went to the state competition {where you have to dress in full suit} and begged me to put cufflink holes in his standard shirt so that he could sport his cufflinks that he got for Christmas. Apparently, shirts with cufflink holes are far more expensive then your run of the mill standard dress shirt. Who knew? And more expensive is just not my MO, so alas, I knew there was a way to do it on my own and save money. Here's how I did it!


How to start with making your standard shirt cuff link ready


I started with my son's standard dress shirt.

You know it's a standard dress shirt because of these two buttons on the cuff.


You want to remove the buttons.


Now fold back your cuff and you will have four layers.

Your cufflink will go through all four layers of your shirt, however, as it is now, there is only one button hole.


Sew on a buttonhole


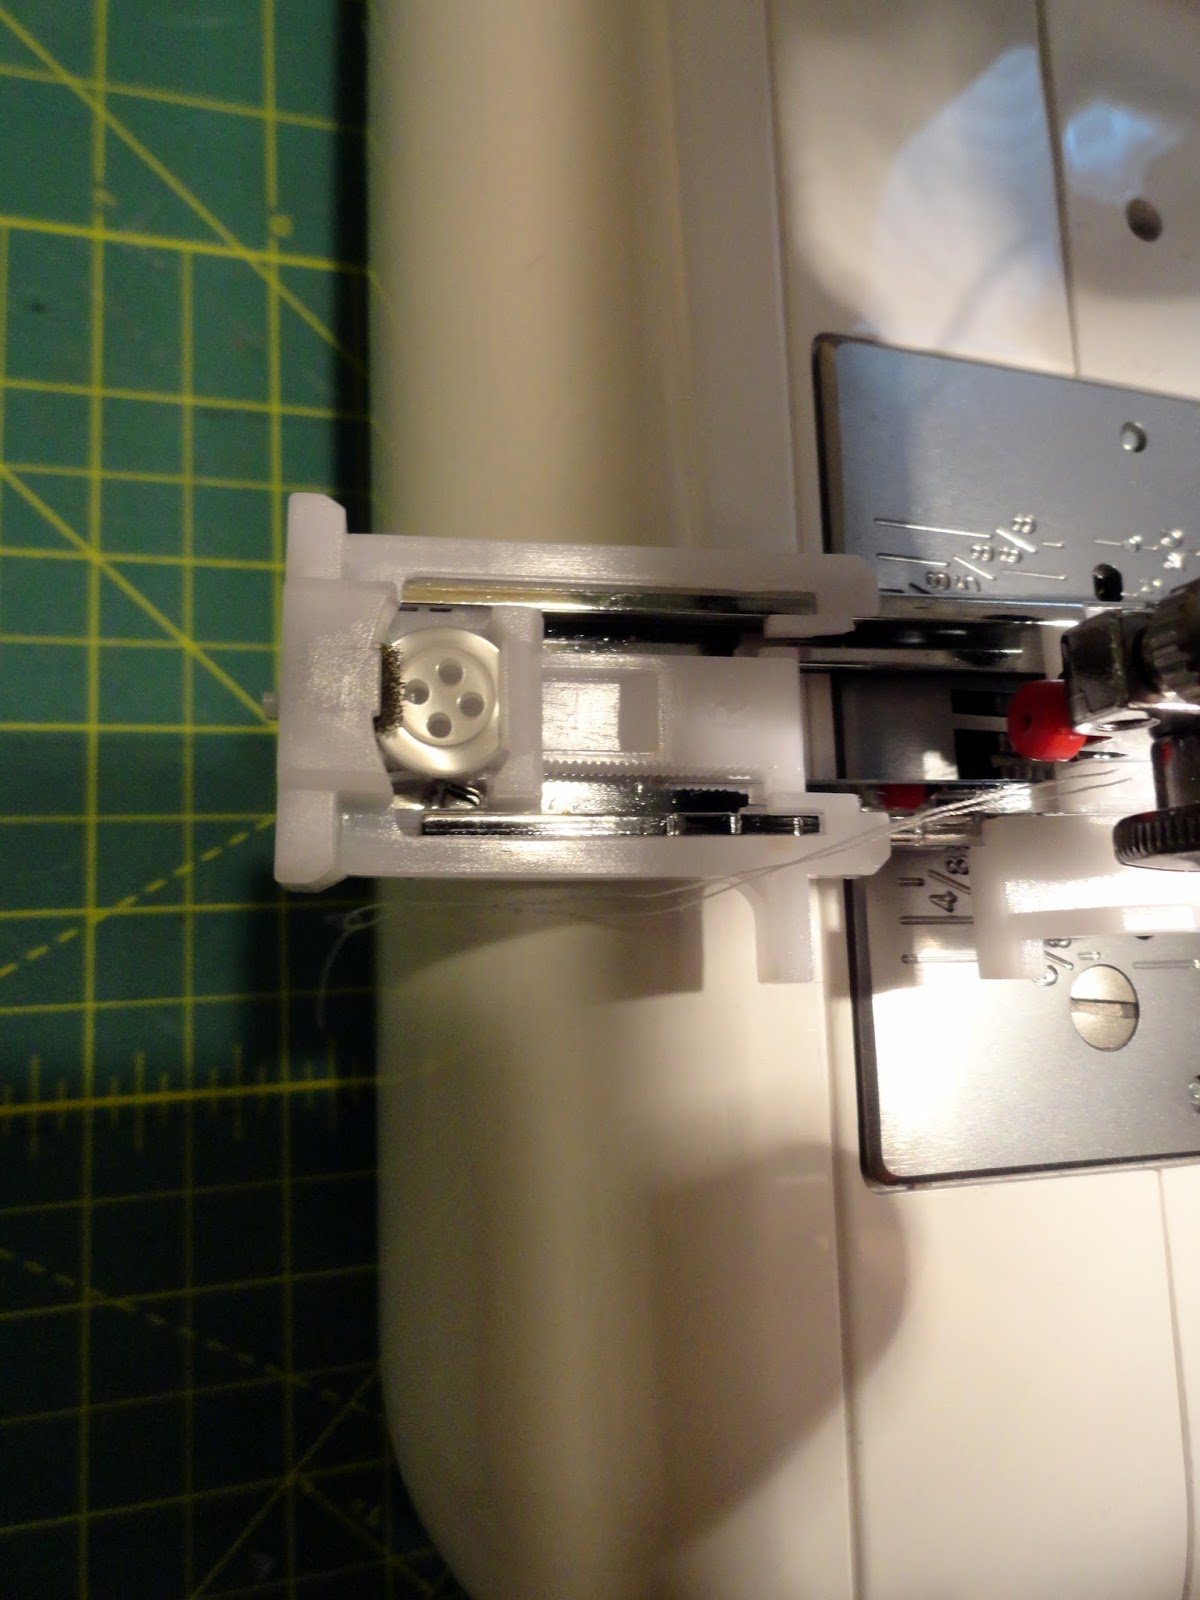
I used the button that I removed and put on my button hole foot on my sewing machine. This feature on my Janome sewing machine is amazing!

I don't remember button holes being so easy! If you don't make button holes often, you may want to practice on a scrap piece of fabric.


Mark through your button hole where you will need to make your new button hole.

You will need to make this mark on all three layers that you will be creating a new cuff link hole.


This is a picture of four button holes
{see the two below the cuff}


Use an xacto knife and cut open your button hole.


Fold back your cuff and insert your cufflink through all four layers.

That's it!

It took me about 5 minutes to do on each side.


This little trick will save you a ton of money and will give you a very high end look. 

How to Put on Cufflinks?


Welp, that's an age old question!  

With your shirt on, pinch the cuffs of the sleeve together. Insert the cufflink through both holes in the shirt's cuff. 

The decorative part faces the outside.

On the backside of the cuff, flip the bar to hold your cuff link in place.

Aren't you going to look nice?! 
3

Family Pizza Party


April has been a busy month for us.
My oldest son spent 10 days on a mission trip in Mexico, and then after only three days at home, he left again for a four day school field trip.  Throw in normal life activities and it felt like it had been forever since we had a quality family night.
When we had a free evening, where all five of us were going to be home, 
I knew just the thing to bring us all together.
Food.
And not just any food... pizza.  
Tony's pizza to be exact.
I have a teenage boy, nothing says love more than pizza.

While shopping at Walmart, I picked up three Tony's pizza's. 
{major bonus, I had a coupon!  You can get one too at coupons.com, while supplies last!}

Not only are Tony's pizza's affordable, they are delicious!
They now have a crispier crunchier crust and are topped with real cheese and sauce made with real tomatoes.


I prepped some of my families favorite side dishes and in less than 20 minutes, 
we were ready for a full night of quality family time!


Once that authentic pizzeria smell wafted through the house, the family came running!


Not only were we able to share a meal, we were able to make memories.


We talked about things that went on while my son was gone


and shared stories about life.


It was a successful family night around the dinner table.
Sometimes, you just really need that.

0

How to negotiate at a garage sale-5 tips that will save you tons of money!

It's nearly garage sale season and one of the questions I always get asked is how do you negotiate.
I shared a few tips and tricks on this post last year, but I think it's time to revisit them so that we all can be prepared as we head out and hit the sales!


1. Know what you are dealing with

It's inevitable that every week I will come across a garage sale that doesn't have their items marked.
It's not my biggest garage sale pet peeve, though it is up there.
If the items at a sale are not marked you just don't know what you are dealing with.
If the items aren't marked, I typically find something that I want and ask the seller what they are asking for the item.

If we are really far off base, I usually just walk away.

You know, those garage sales where the prices are so high that the people would just rather keep their stuff.

If a seller wants $350 for a dresser, I know that I will probably not be able to get that dresser negotiated down to a price I am willing to pay, unless I am willing to pay close to the asking price.

But if they say that the clothes for example are a dollar a piece, then I know we are in the same ball park.

2. Bundle and save

I usually buy a lot of clothes and it's pretty typical that a garage sale doesn't have each item individually priced.  Again, lets say each clothing item is $1 a piece.  It's not unheard of at a person's sale that if I like one piece I usually like several items.  So say I find 14 articles of clothing.  I will usually go to the seller and say I have 14 items, would you take $10?
9 times out of 10 they will say yes.

3. Add up your items with the seller

The majority of the time when I go with an armload of items to the seller {usually if they are unmarked}, the seller will make a crazy out of no where price for the lot.  I like to ask periodically as I shop what the items price is so that I can have an idea and I think it forces the seller to think about the value of the item.  For example, books are a quarter, clothes are a dollar, etc...If I don't add the items up and ask how much the seller will take for the items that I have, usually the price they come up with is higher than the actual price they have quoted me.

 I have taken to adding up the items with the seller first and then asking for a lot price after we know the total.  10 items in your arms looks like the value should be much higher than the low garage sale price you are paying.  Especially if the seller isn't familiar with garage sale prices!  If my 10 items add up to $8, then I will ask if the seller will take $5.  This tactic works much better then just asking for nearly half of my stuff for free!

4. Be willing to walk away 

 This is huge!  If you want to negotiate for the sake of negotiating, then that is fine.  In fact, it's one of my favorite things to do!  If you have a bottom line, and the seller won't budge, then be willing to walk away.  It's quite common that I will put items back at a sale or reduce the items that I am buying if I am not getting as big of a discount or paying the price that I want to pay.

Don't be rude about it! Just put the item back and walk away.  Most of the time, the seller will change their mind as I walk down their driveway, other times they won't, and that is totally fine!

5. Start your negotiating low so you have wiggle room

Bargaining at a garage sale is fun for me.  I like to pay the lowest price possible and get the most high quality items possible.  Negotiating is part of having a garage sale and it's a two way street.  Assume that if you are going to offer a lower price, that the seller will come back with another {higher} offer that they are willing to take.  It's just part of the game.  If you start low, and you get your first asking price, then you had a major score.  Pat yourself on the back.  If you don't negotiate, you will never know if you could have gotten the items cheaper, but if you make an attempt to negotiate a lower price, you can leave with the satisfaction that you tried.  And you still might possibly come out with a better price!

Don't be unreasonable.  If the prices are fair and you are willing to pay them, don't haggle just to haggle.  That is, unless you are buying a huge lot of items from the seller, then I think that it's reasonable to offer a lot price {after you calculate your items of course!}.

For example, I went to a garage sale of a home school parent last summer.  This parent had some amazing books in their library at very reasonable prices.  Each book was $1 despite the sometimes high retail price.  I picked up 45 books and offered to pay her $40.  If I had only found 4 books I liked, I would not have asked her to take a lower price since I felt like the $1 asking price for pristine hard back books was worth the total.   If I had offered her $20 for the 45 books, that would have been unreasonable.

Tip number 5 and tip number 1 go hand in hand.  If the item you are interested in costs $15 but you are only willing to pay $1, don't be offended if your offer isn't taken.  Be polite, thank them, and walk away.

Hopefully these 5 tips help you negotiate your way to some great deals this garage sale season.
Do you have any tips you would like to add that I might have missed?

If you are hosting your own garage sale, don't forget that I have FREE printable garage sale signs you can download!


1

One Room Challenge Week 4-working on the art work

Welcome back to week 4 of the Calling it Home One Room Challenge.
For the past 4 weeks I have been participating in this 6 week challenge to make over one room.
I have been working on my 8 year old son's vintage airplane room and this week, I focused on creating and collecting art work for Owen's room.


One of the projects that I worked on was this massive
{it's seriously huge!}
vintage airplane blueprint canvas.


I picked up this canvas for $3 at a garage sale.
{I had no idea what a great deal that was until I started pricing out canvases!  YeeHaw!}
It was blank so I used this dark grey paint to dry brush over the plain canvas.


I found a free blueprint on line of a vintage airplane.
And not just any vintage airplane, a B-29, which is the same airplane that my husband's Grandfather flew on during WWII. 
I had it printed as large as I could.
I have heard that you can get an engineer's print at your local copy store for under $5.
I had an inside source who printed this off for me for free.
Which, as you all know, is my favorite word!

I did have to do a little grunt work and cut off the surrounding white edge.

Once my print was cut and ready,
I got out my supplies.
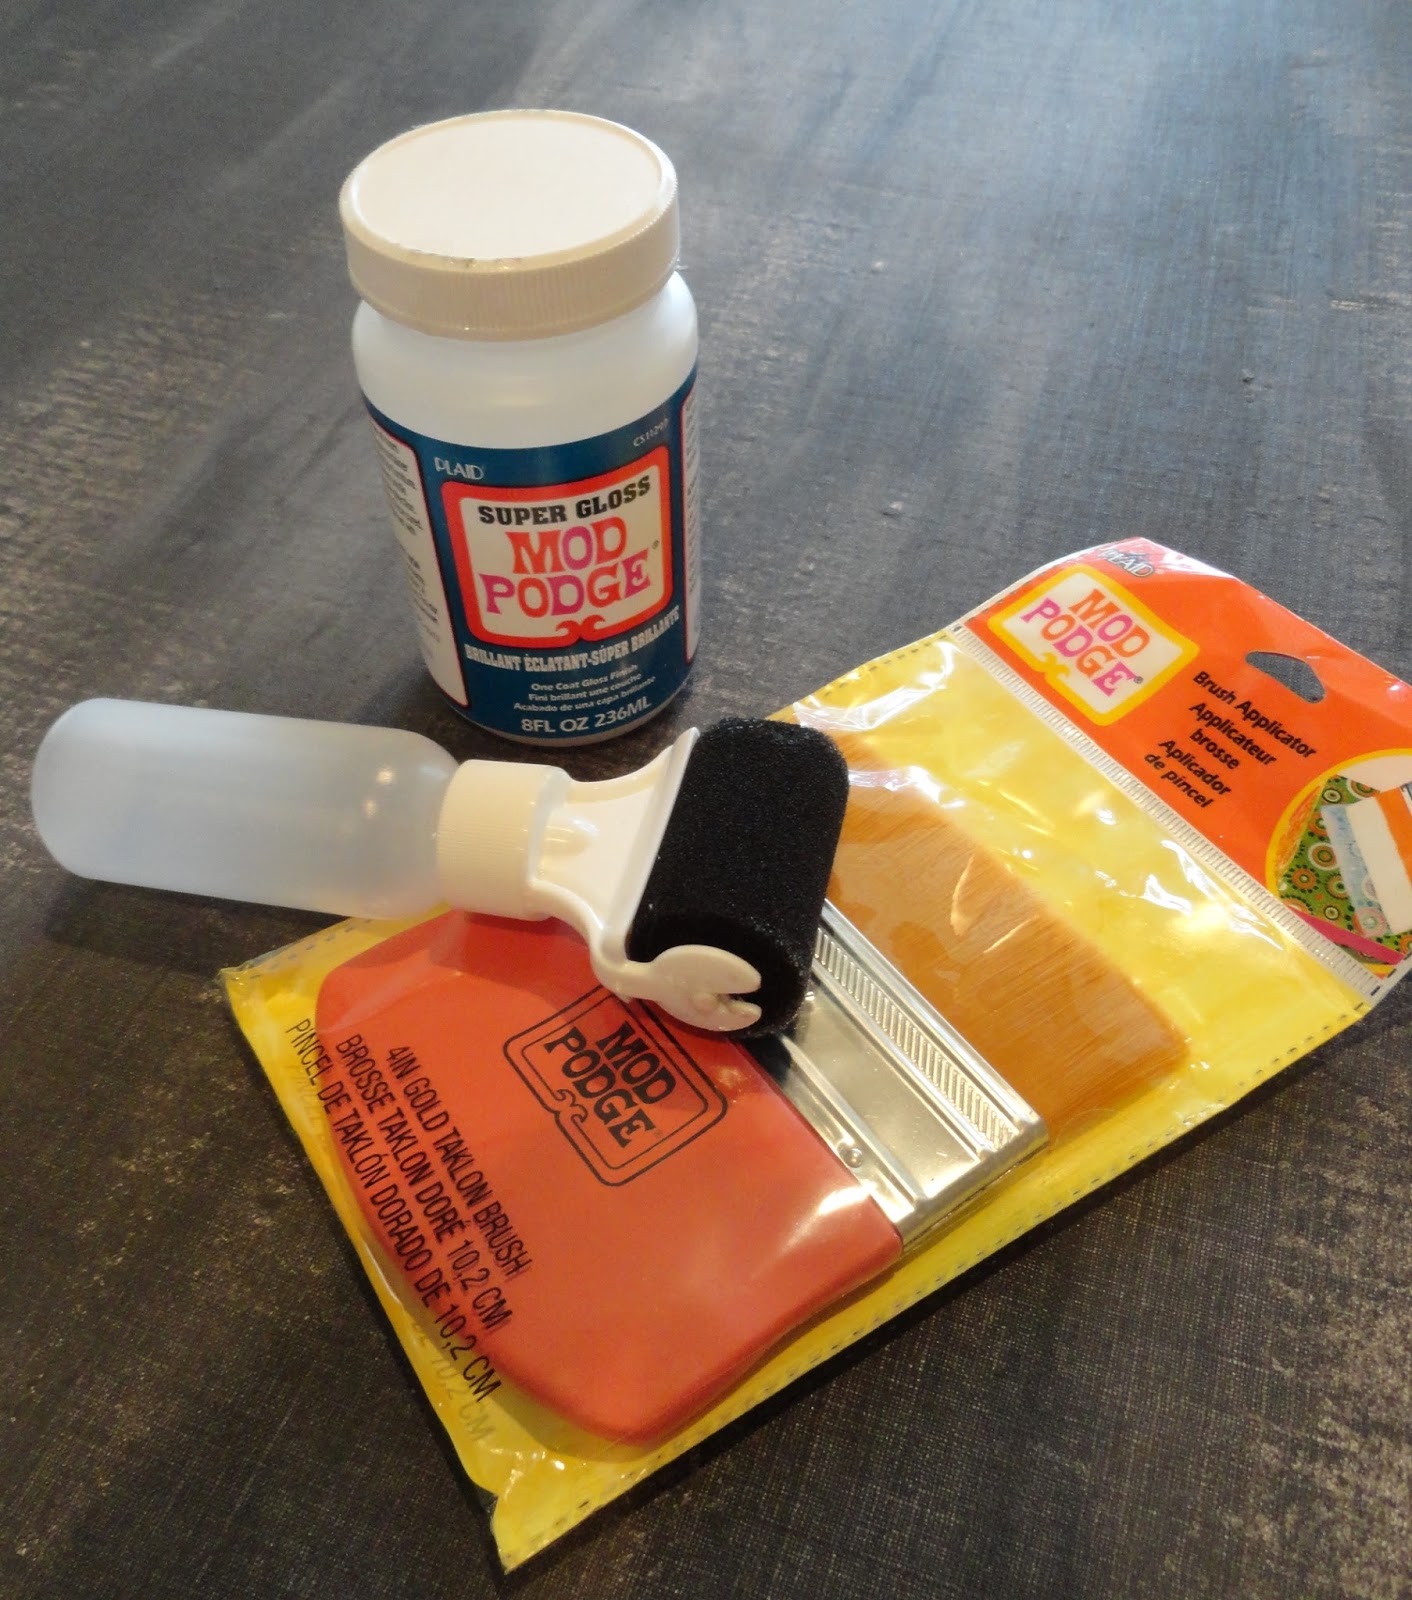
I am lucky enough to have fancy Mod Podge supplies, but you could totally make this work with a simple brush that you have on hand.

But I must say, this Mod Podge roller is pretty rad.
And makes the job super easy!
I started by rolling Mod Podge on to my canvas where my picture would eventually go.
You want to make sure you roll your Mod Podge out smooth.


Next, take your picture and position it on to your canvas.
This is the hardest part.
Because the blueprint was scanned in crooked, the angles were a little wonky, which made eyeballing it a little trickier than normal.
I used a ruler to make sure the edges were all about the same distance from the edge.


Once you have your image positioned, you will spread a layer of Mod Podge over the top of your picture.
This step is not for the super perfectionist.
You will not get a nice flat image even if you work from the center out.
There are wrinkles and bubbles, but I liked the imperfect look for this project and rolled with it.


Once your finish brushing on your top layer of Mod Podge,
let your canvas dry.


I love the end result and can't wait to hang it in it's new permanent location.
{not in my foyer!}

As a re-cap, here is how the past four weeks have broken down.
Week 1
The Plan
Owen's Room
Week 2
Construction
Week 3
Painted furniture, linens, curtains, and rug
Next week, I'm hoping to have the artwork hung and start working on the finishing details for week six.
7

An 80's Throw Back

You guys! I can't even begin to tell you how much fun Throw Back Thursday's are for me. I don't always participate, but when I do it always puts a smile on my face remembering the good times.

I know it's only Wednesday, but I wanted to catch you the day before so that you could trump my 80's style with your own.  But first, I want to share some awesome pics of me in that awesome awkward  era.

Check out my little brother who is totally working the Miami Vice jacket over the shoulder thing.
And look at those tight rolled jeans. What the heck were we thinking?!


A sweater under overalls? Yep, totally awesome! Come to me for all your style advice.


My best friend Audrey and I circa 1988. I wish I had stock in some perm company then. Remember how awesome perms were? Spiral perms for the win!


Oh, you know, just taking my bunny out for a little walk around the neighborhood. Yep, Snowball is on a leash. And for the record she hated it.


Me and my kitty Alex P. Kitten. Wait, you had an Alex P. Kitten too? I thought I was so original with the name! Obviously Family Ties wasn't super influential on the children of the 80's!

And lets take a second to check out my purple suit and big glasses. Totally adorable right?! The glasses have a cool tiger sticker on the lens. I remember that my parents paid extra for that.
Totally worth it!


Know what else I remember from the 80's? Some awesome TV shows.They seriously don't make them like they used to!

Did you know that Netflix offers a full line up of oldies but goodies that you can stream? I can't even begin to tell you how much I loved reading The Babysitters Club. I had no idea it was a TV show!
I can still sing the Jem theme song, can you?

And speaking of theme songs, my guess is that every last one of you knows the Saved By the Bell theme song am I right?!


Remember Jell-O pudding pops? Every time I ate one I would stick my tongue to it first thing and it would always stick Ralphie Style. Ah, memories.

How much fun was this little throw back? You guys are jealous of how cool I am aren't you? I know it!
1

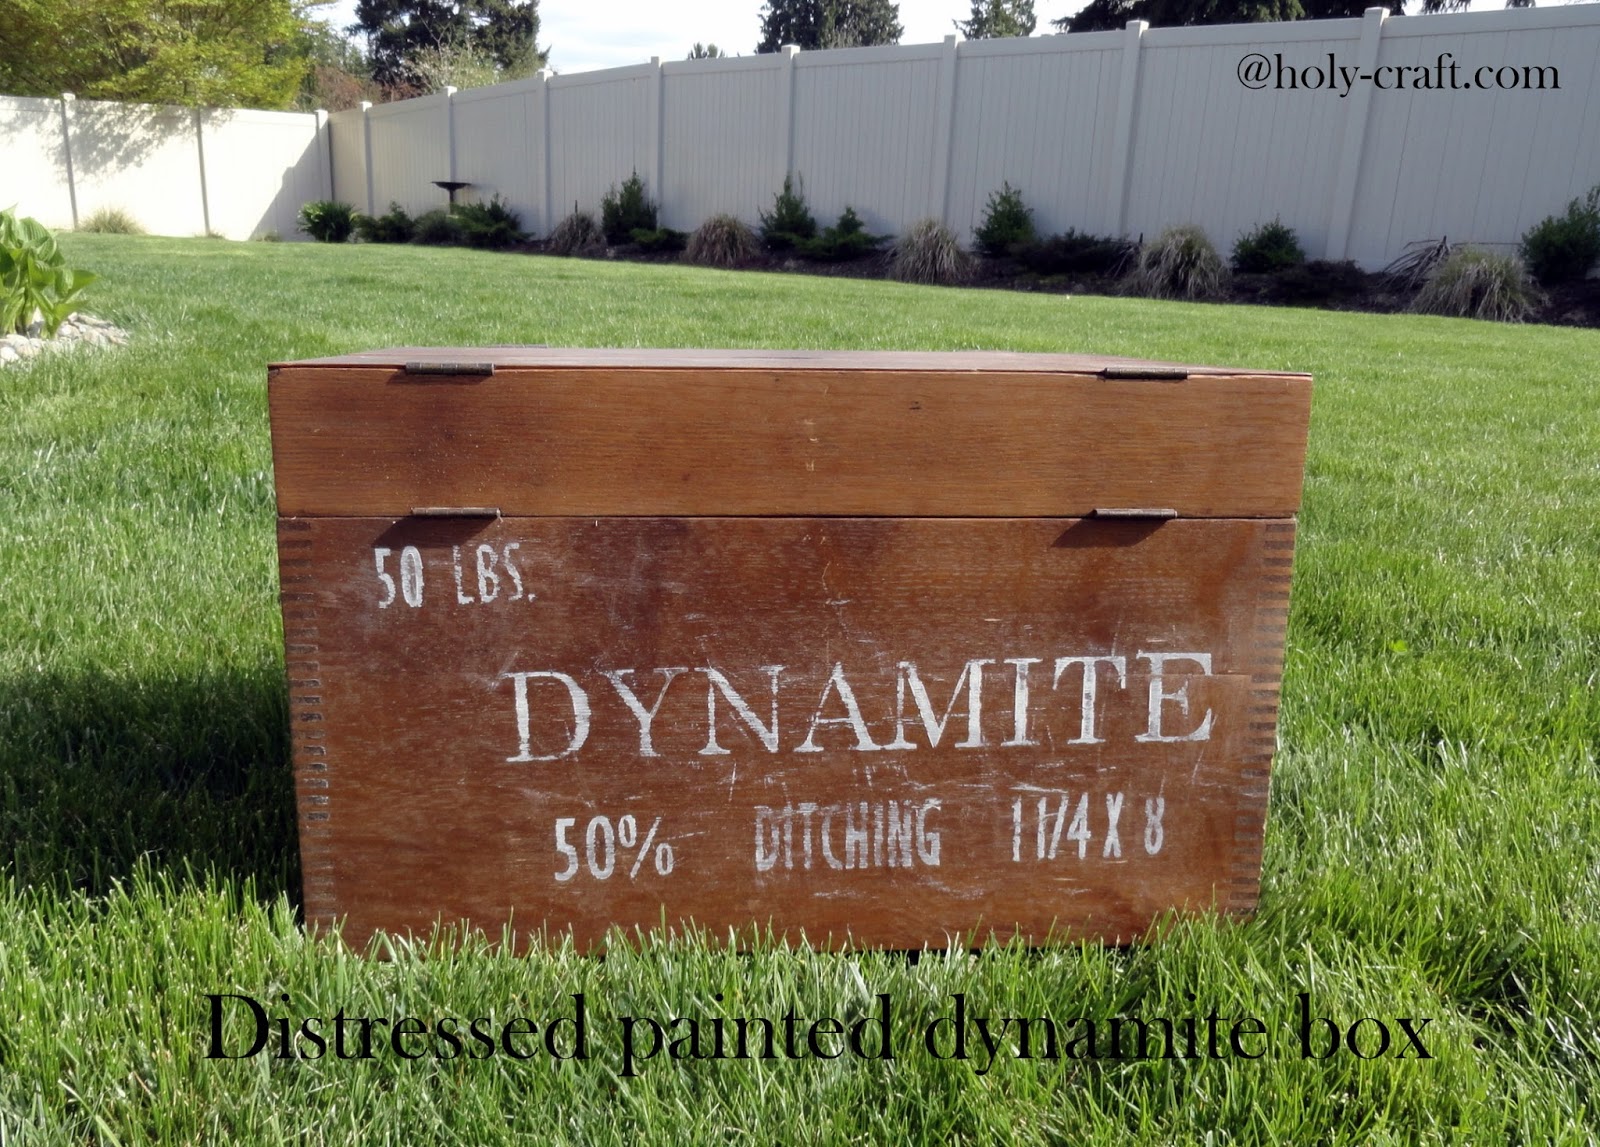
Vintage box turned Dynamite storage box with simple distressing and painting technique

It's easy to take a plain vintage find and give it new life with a little paint.


I had this nice solid wooden box that was super plain.
It was screaming for some history.
Or a back story.
Something!
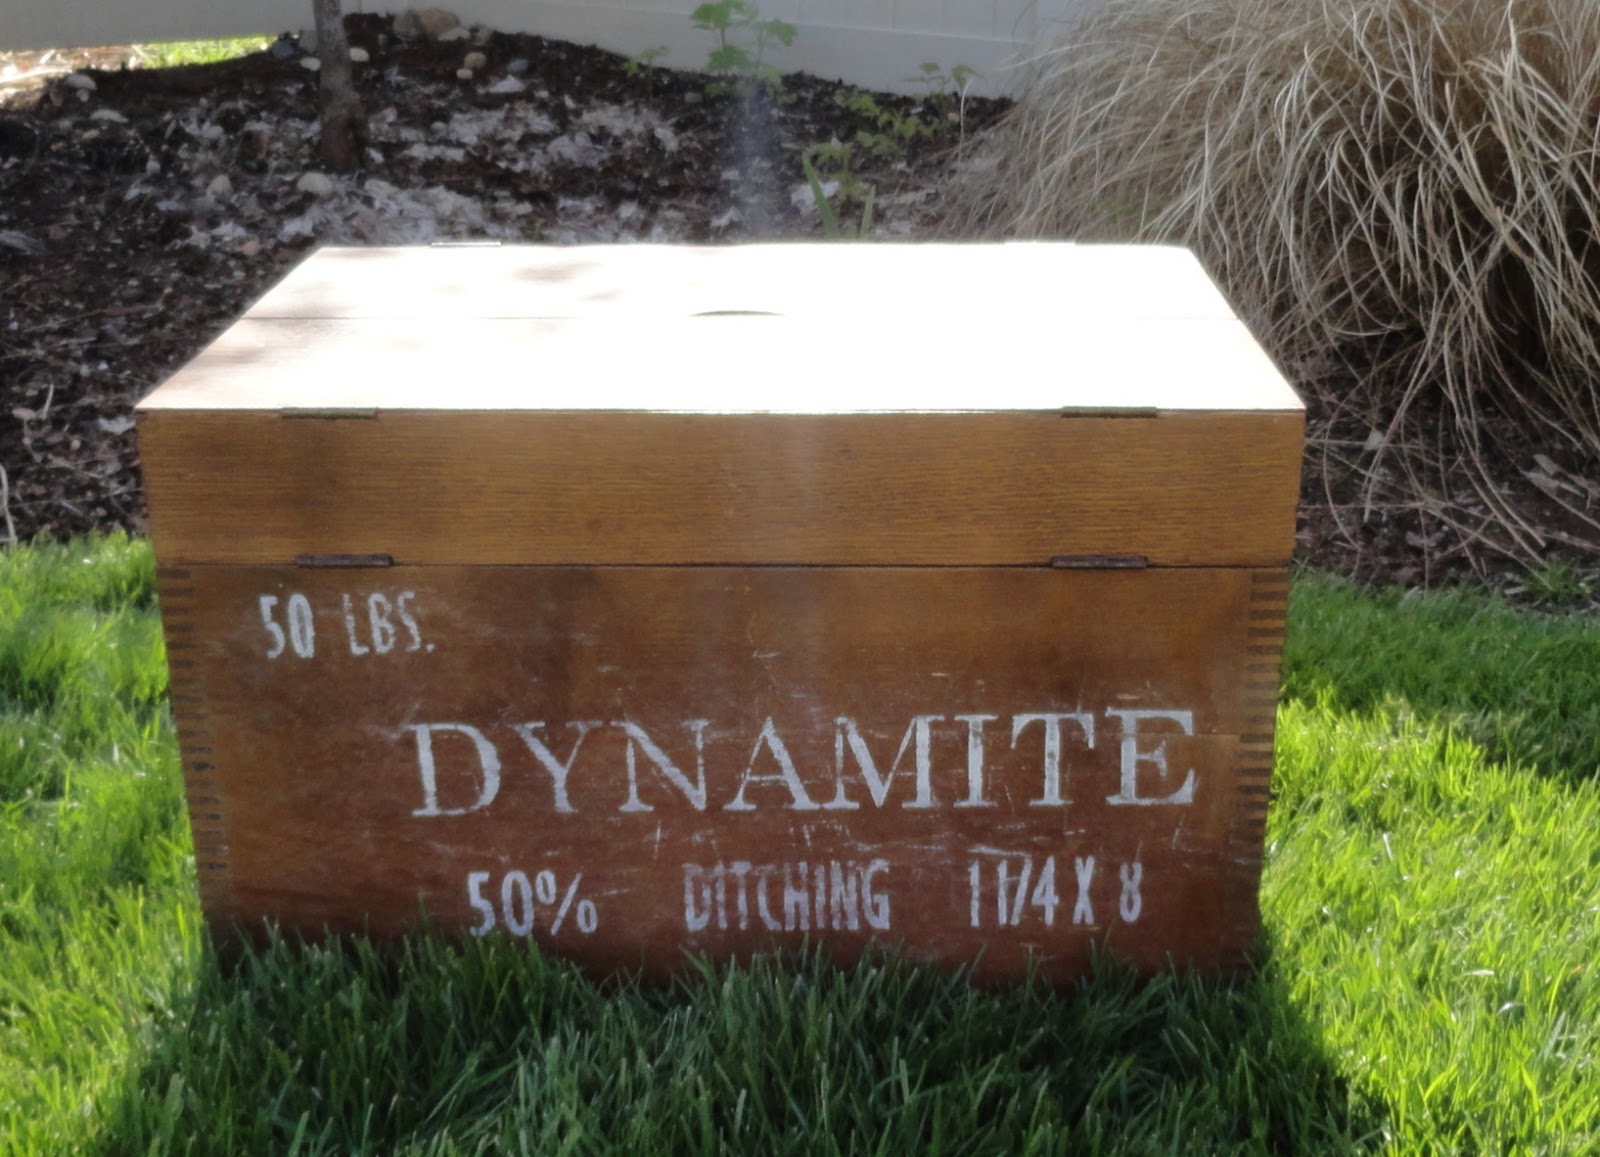
I decided that it looked like an old vintage dynamite container that I have seen at antique shops and garage sales before.  I used some simple techniques to give this plain box a little more charm.


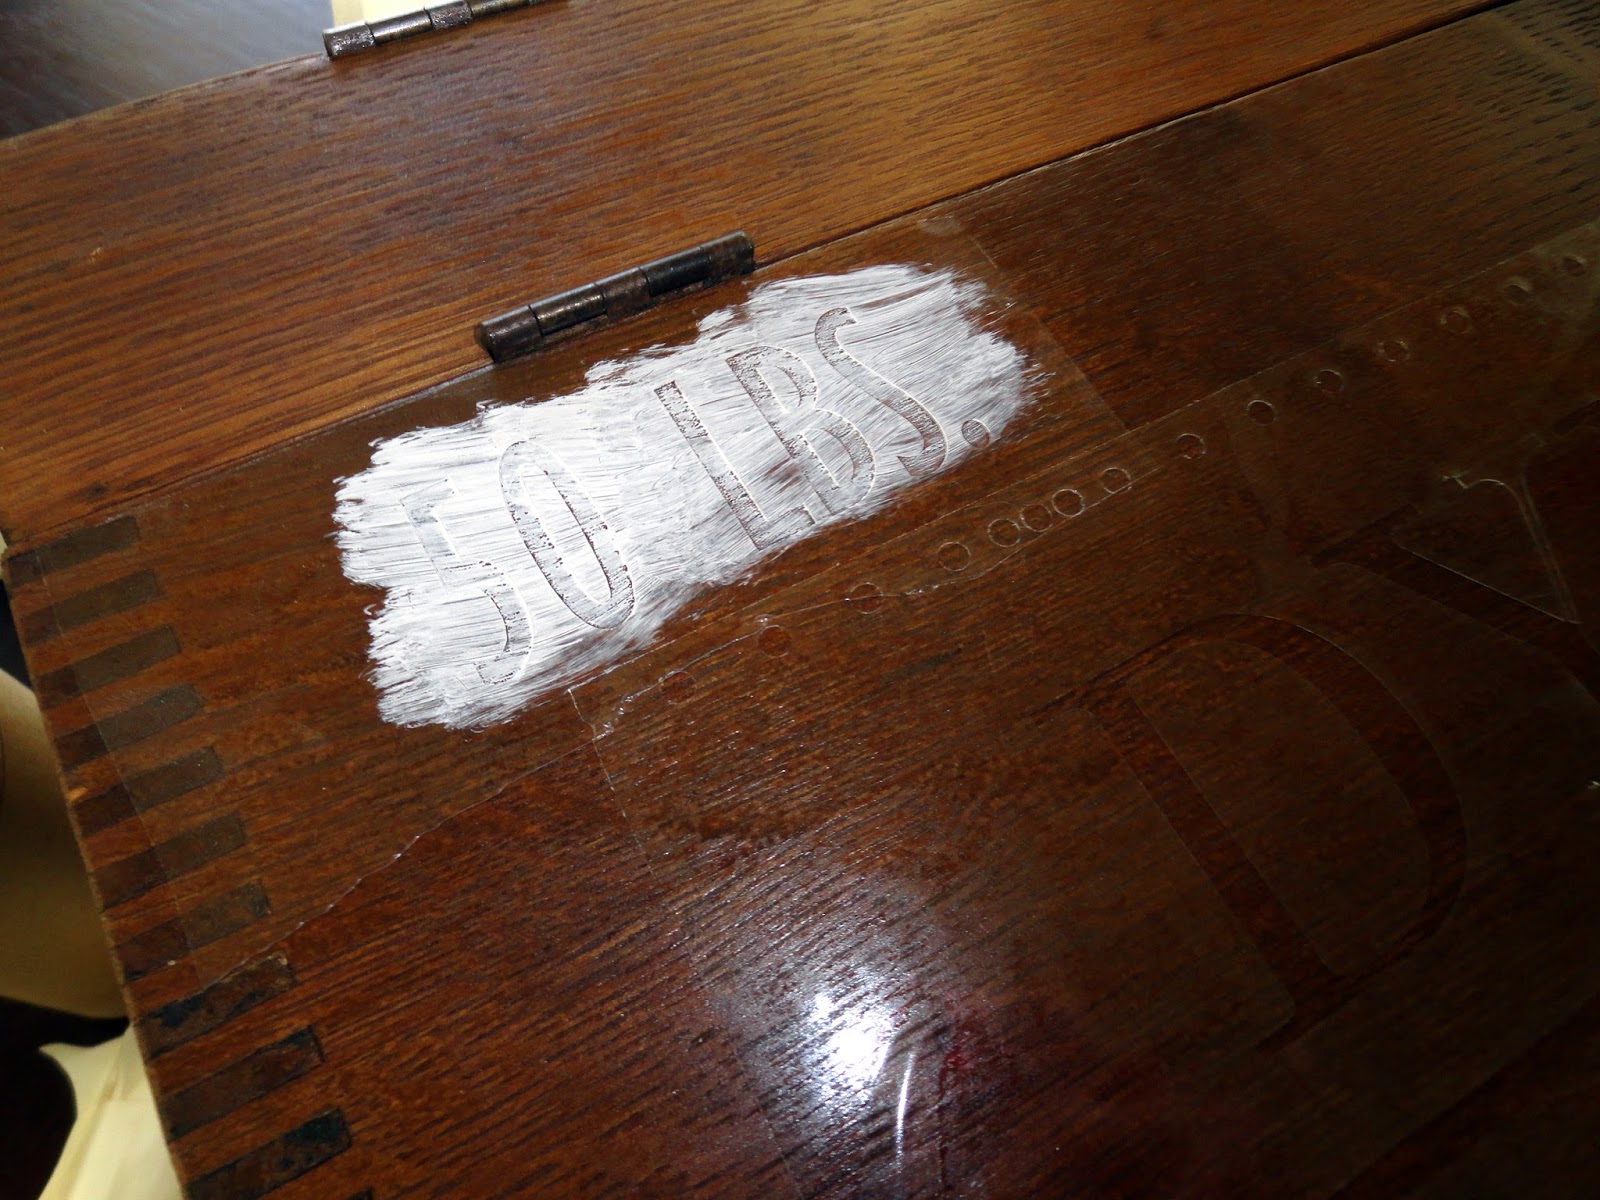
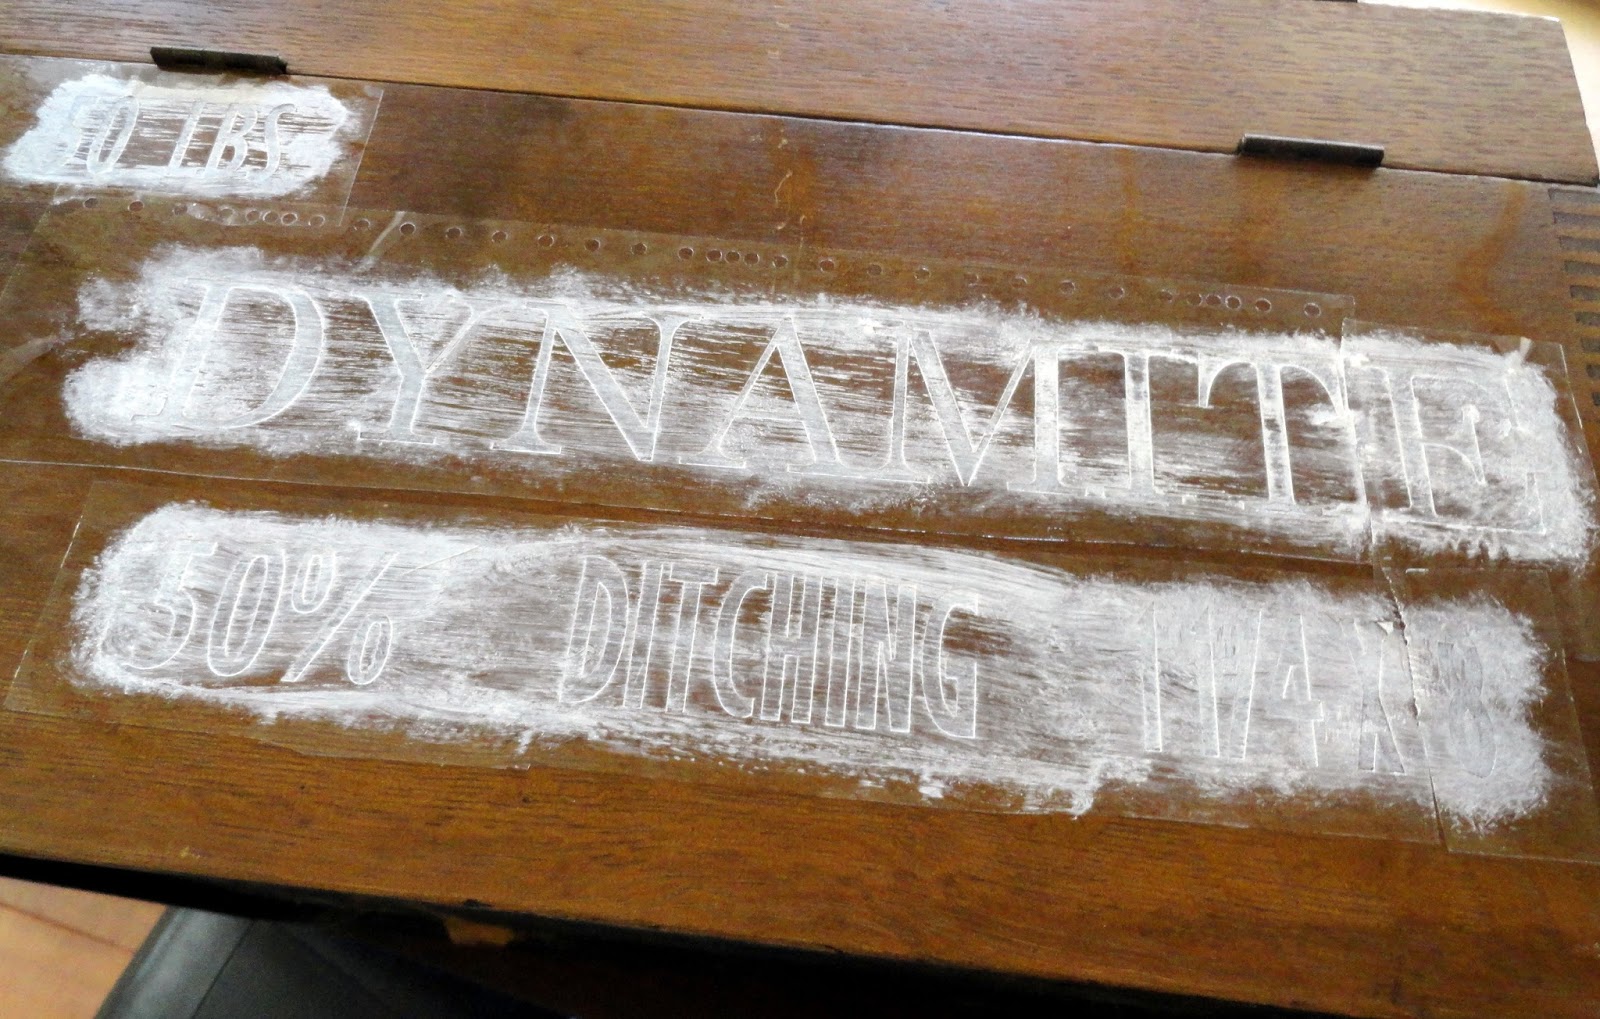
It's hard to see, but if you look closely there is a clear stencil that I cut out on my Silhouette machine.
I used transfer tape to apply the letters where I wanted 
{I probably could have centered them better}


I used a very dry brush and painted over my stencil with white paint.
I didn't want a nice crisp line,
I wanted this box to look like it had some history so I used as little paint as possible to make it look authentic.
If you are a perfectionist, this isn't the kind of craft that will be good for you!


Once you have all of your stencil painted,
let it dry.


Remove your stencil and use sand paper to distress the letters and painting even more.


What do you think?
Think it was always a dynamite box?

1

Teachers change lives. Who was your favorite teacher?

I am a mom of three kids.
My mom was a teacher.
I grew up playing teacher thinking that one day I would follow in my mom's footsteps.
However, life took a different path.
I am thankful that I get to be involved in my children's education.
I have been participating in some capacity in the classroom since my oldest son
{a sophomore} was just 20 months old and involved in a parent/tot class.
All of my kids were a part of a co-op preschool where parents "work" in the classroom as an art, snack or TA parent helper.  My oldest son started elementary school and I joined the PTO.  I've been a part of parent organizations {even serving as PTA president} for 12 years.
I've been "doing" school with my kids in some form for 14 years straight!
As the kids get older, I am still in their classrooms or at their school.
I get to work in the student store at my middle school daughter's lunch, serve concessions at my oldest son's school and volunteer in the classroom of my third grade son.
Because I am in the classroom and at the school, I see how hard teachers work.
I see that even when teachers are on their lunch break, they are still helping or serving kids.
I see that teachers are working long before the first bell and long after the last bell.
I see teachers buying supplies with their own money,
teachers coming up with new ways to engage kids in learning,
and teachers inspiring our kids to think outside of the box.
My kids have had many teachers throughout the years.
Most of them have been exceptional.
There are a few that have stuck out and I know my kids will always remember so and so when they look back on their education.
For instance, my oldest son was in Kindergarten at a private gifted school.
His teacher, Mrs. V. noticed that he checked out a book about algebra during library time.
He was working on the problems during book time and Mrs. V. realized that Aidan was teaching himself how to do algebra by reading a book.  She came to me and asked if it was o.k. for her to bring in an algebra professor to actually teach Aidan the basics of Algebra so that he wouldn't have to teach himself.  Of course I said yes, and Aidan spent several weeks as a 6 year old in Kindergarten working out algebraic equations.
When my daughter was in third grade her teacher Mrs. Larsen had a real gift for teaching kids how to write and understand the writing process.  I happened to be in class one day volunteering and was asked to help with the writing assignment.  It started with a writing prompt
 {I even remember the prompt! It was "if you could have a twin would you and why?"}
The kids got 5 minutes to write continuously {myself included} and then the students shared their writing.
I only participated in the writing prompt once, as an adult and I became a much better writer after that exercise!  My 8 year old daughter {at the time} grew to love writing during that year and learned not only writing techniques but respect and empathy through the exercises.
My youngest son is an out of the box thinker.  I am thankful that his teachers have all embraced his way of thinking and have only tried to redirect him and encourage him.
Last year, as a second grader in Ms. Hauge's class, my loquacious son Owen, who has always had a large vocabulary was feeling bored with the easiness of the definitions on this spelling assignment and decided to have a little fun with this spelling word match up. I love that his teacher didn't put a giant X on this in red pen, only wrote "too confusing".  We explained to Owen that it was homework for him, not an unscramble game for his teacher!
Just this year, Owen came home excited on the first day of school because his new teacher Mrs. Durr played "the best" first day of school get to know you game.  You write down three facts about yourself on a small piece of paper.  You wad up the paper making a ball and literally have a snow ball fight with the papers.  When the teacher says stop, the kids pick up the paper closest to them and they read about their new classroom friend.  This first day of school game left a huge impression and having a teacher who is constantly surprising the class with new fun activities makes it exciting to go to school and find out what is going to happen today.
Teachers change lives. Great teachers inspire kids and ignite a fire in them for learning.
Office Depot and Adoptaclassroom.org partnered together to raise awareness about teachers and all that they do in the lives of their students.  They traveled the country looking for great teachers that were going above and beyond.  Teachers who were inspiring kids and igniting a passion for learning.
Check out this video of a pre-engineering teacher empowering teenagers to shift the focus from themselves and put it on helping others. Brian Copes students make prosthetic limbs for people in Honduras from old car and bike parts.  Talk about thinking outside of the box!
  
Teachers are doing innovative things in the classroom every day and you can help them do even more by donating.  Donating your time or by donating money to a teacher that is changing lives.
Feeling inspired?  If you are a teacher, you can register your classroom.  If you would like to donate, please follow the link below.
  • How to Register Your Classroom as a Teacher
    1. Go to Teachers Change Lives website 
    2. Click on the red box that says "Register Your Classroom," which will take you to the Adopt-A-Classroom website.
  • How to Donate to a Teacher
    1. Go to Teachers Change Lives website 
    2. Click on the teal "Donate to a Teacher" box on the Teachers Change Lives website, which will take you to the Adopt-A-Classroom website. 
 Adopt-A-Classroom is a non-profit organization that connects donors with teachers to enhance the learning environment for students.

I'm sure it doesn't take you long to think about a favorite teacher that inspired you when you were in school.
Teachers are changing lives, but they can't do it alone.
Support your teachers.
Volunteer.
Donate.
Appreciate.
I was selected for this opportunity as a member of Clever Girls Collective and the content and opinions expressed here are all my own.
1
Powered by Blogger.